Difference between revisions of "X-Payments:Configuring the connection to X-Payments in the Magento Admin panel - Magento Connector 1.8.0 or later"
m |
m |
||
| Line 12: | Line 12: | ||
# Click '''Deploy'''.<br />[[File:xp_magento_connection_settings4.png|700px|border]]<br /><br />In a couple of seconds, the configuration bundle will be deployed, and a success message will be displayed at the top of the page:<br />[[File:xp_magento_deployed_successfully.png|700px|border]]<br /><br /> | # Click '''Deploy'''.<br />[[File:xp_magento_connection_settings4.png|700px|border]]<br /><br />In a couple of seconds, the configuration bundle will be deployed, and a success message will be displayed at the top of the page:<br />[[File:xp_magento_deployed_successfully.png|700px|border]]<br /><br /> | ||
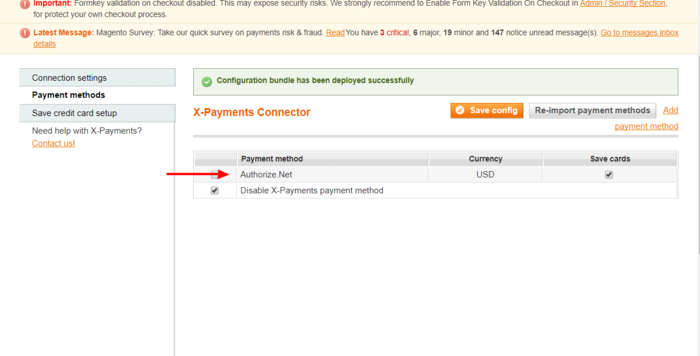
# Check the list of payment methods that have been imported from X-Payments. On the screenshot below you can see that a single payment method has been imported - "Authorize.Net":<br />[[File:xp_magento_authnet_method_imported.png|700px|border]]<br /><br />If you need to add more payment methods that will work for your Magento store via X-Payments, you will have to add them in X-Payments and use the '''Re-import payment methods''' button in the Magento store to import them.<br />[[File:xp_magento_re-import_payment_methods.png|700px|border]]<br /><br />To quickly access the X-Payments page where you can add more payment methods, use the "Add payment method" link.<br />[[File:xp_magento_add_payment_method_link.png|700px|border]]<br /><br /> | # Check the list of payment methods that have been imported from X-Payments. On the screenshot below you can see that a single payment method has been imported - "Authorize.Net":<br />[[File:xp_magento_authnet_method_imported.png|700px|border]]<br /><br />If you need to add more payment methods that will work for your Magento store via X-Payments, you will have to add them in X-Payments and use the '''Re-import payment methods''' button in the Magento store to import them.<br />[[File:xp_magento_re-import_payment_methods.png|700px|border]]<br /><br />To quickly access the X-Payments page where you can add more payment methods, use the "Add payment method" link.<br />[[File:xp_magento_add_payment_method_link.png|700px|border]]<br /><br /> | ||
| − | # | + | # If you look at the details of the payment method "Authorize.Net" we have imported from X-Payments, you will see that it is set to work using the currency "USD".<br />[[File:xp_magento_authnet_currency.png|700px|border]]<br /><br /> The currency is set in X-Payments, and should you want to change the currency used, you will want to do that via the payment configuration settings on the X-Payments end, after which you will have to re-import the payment method settings into your Magento store with the '''Re-import payment methods''' button. |
| + | # | ||
| + | # After the deployment of the configuration bundle the payment methods imported from X-Payments are not active for your Magento store yet. (Note the option "Disable X-Payments payment method" which is currently enabled):<br />[[File:xp_magento_disable_xp_payments.png|700px|border]]<br /><br />To be able to use the imported methods, you will need to activate them. To activate a payment method, | ||
Revision as of 11:42, 31 December 2017
After configuring the connection to your Magento store in X-Payments, log in to your Magento Admin panel and complete setting up the connection on the Magento end.
The following procedure assumes that:
- You are using a Magento connector version 1.8.0 or later.
- Your Magento store has the X-Payments connector extension installed.
Complete the following steps:
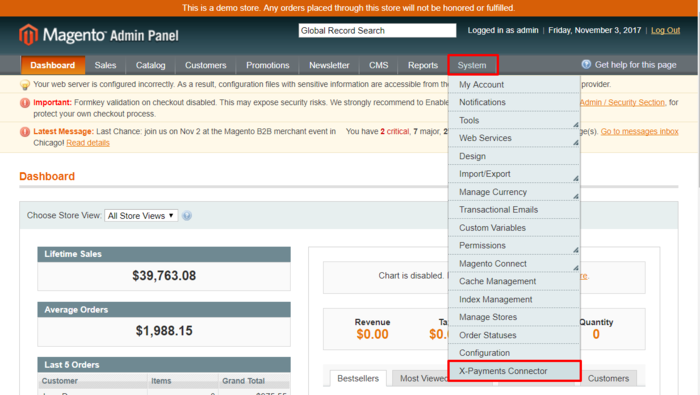
- Log in to the Admin panel of your Magento store.
- Go to System -> Configuration:
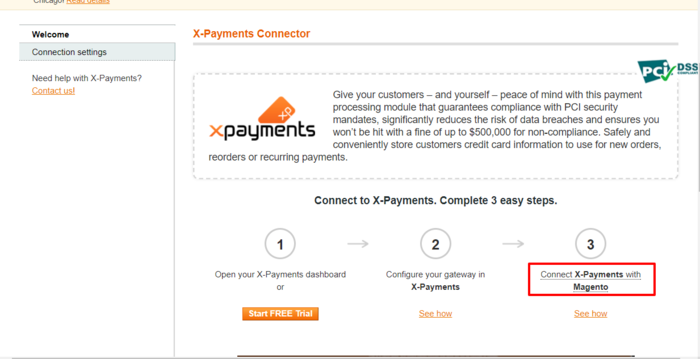
The page showing how to connect X-Payments with Magento in three easy steps opens:
- Click on the link "Connect X-Payments with Magento":
This opens the Connection settings section: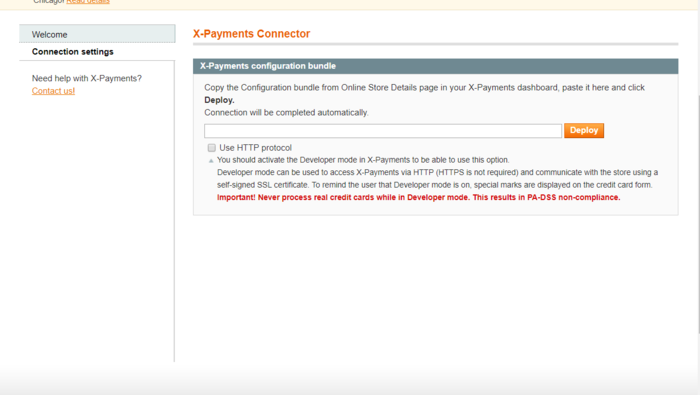
- In the details of your Magento online store in the X-Payments back end, copy your X-Payments configuration bundle and paste it into the respective box in your Magento Admin panel.
If you are using X-Payments in Developer mode and need to enable communication between X-Payments and your Magento store via HTTP, enable the Use HTTP protocol option. - Click Deploy.
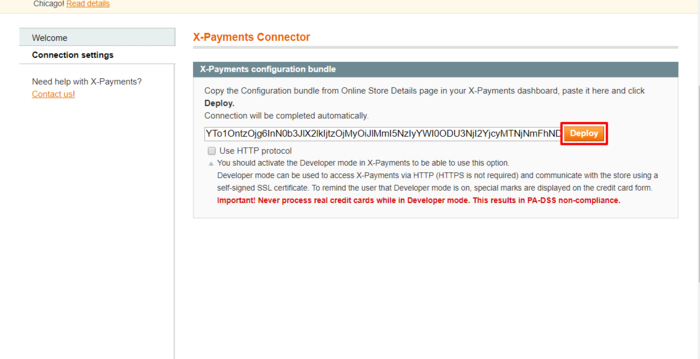
In a couple of seconds, the configuration bundle will be deployed, and a success message will be displayed at the top of the page: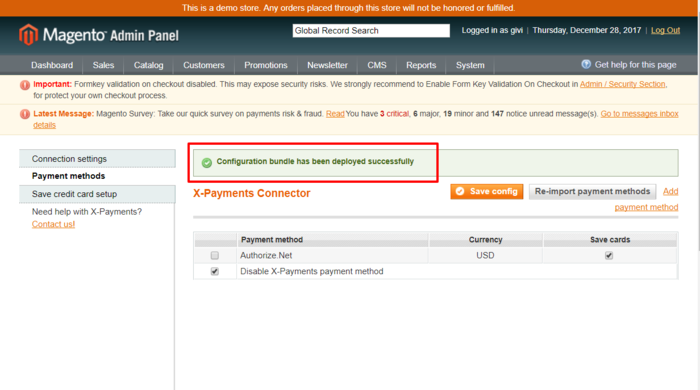
- Check the list of payment methods that have been imported from X-Payments. On the screenshot below you can see that a single payment method has been imported - "Authorize.Net":
If you need to add more payment methods that will work for your Magento store via X-Payments, you will have to add them in X-Payments and use the Re-import payment methods button in the Magento store to import them.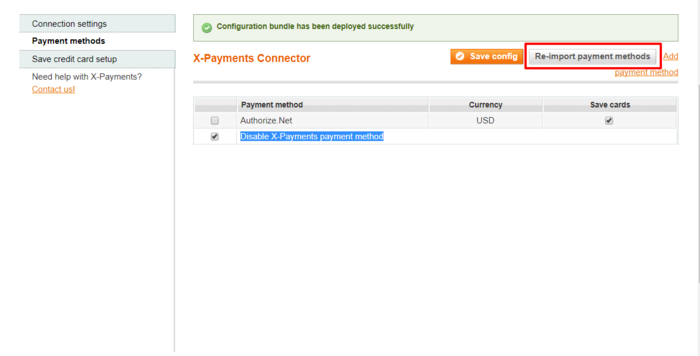
To quickly access the X-Payments page where you can add more payment methods, use the "Add payment method" link.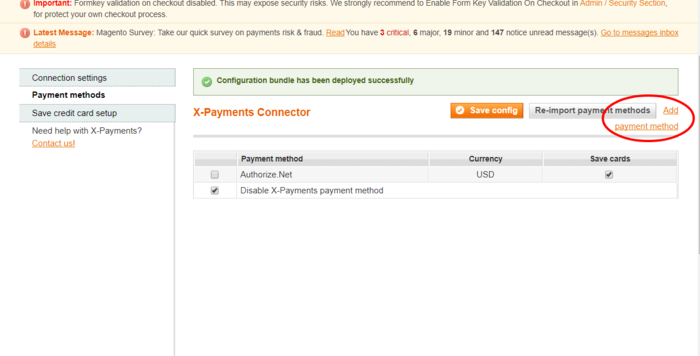
- If you look at the details of the payment method "Authorize.Net" we have imported from X-Payments, you will see that it is set to work using the currency "USD".
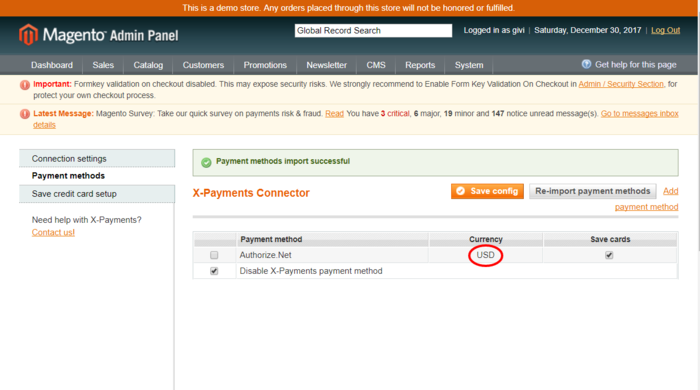
The currency is set in X-Payments, and should you want to change the currency used, you will want to do that via the payment configuration settings on the X-Payments end, after which you will have to re-import the payment method settings into your Magento store with the Re-import payment methods button. - After the deployment of the configuration bundle the payment methods imported from X-Payments are not active for your Magento store yet. (Note the option "Disable X-Payments payment method" which is currently enabled):
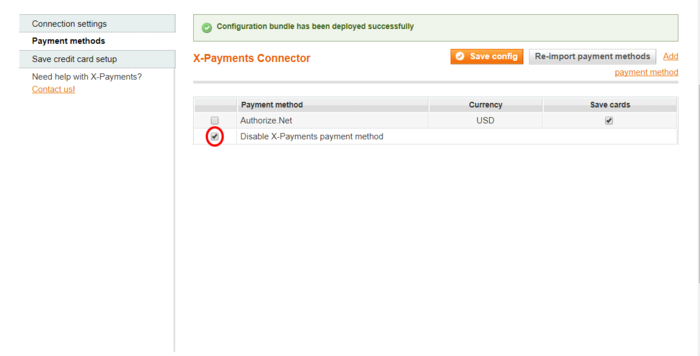
To be able to use the imported methods, you will need to activate them. To activate a payment method,


