XP Cloud:Customizing the Payment Form Appearance
- X-Payments Cloud: General information
- Get Started with X-Payments Cloud
- Two-factor User Authentication
- General Settings
- Payment Configurations
- Services
- Users
- User Interface
- Payments
- Payments List
- Payment Statuses
- Search for Payments
- View the Details of a Payment
- Delete a Payment
- Auth and Capture (Capturing Funds)
- Void an Authorization
- Issue a Refund
- Manage High Risk Transactions
- Emulate Transactions
- Clear Cardholder Data
- Tokenization and Re-Use of Saved Cards
- Delayed Payment Feature
- Supported Payment Gateways
- What's New in X-Payments Cloud
X-Payments Cloud provides an interface for the customization of its payment form. The appearance of the payment form can be changed via the Appearance page of your X-Payments Cloud admin panel (Settings -> Appearance).

Note that this page is available only from the X-Payments Cloud standalone admin panel (not if accessed from within the admin panel of your online store.
Here is what the Appearance page looks like:

First, you need to select the template that will determine the appearance of your payment form. At the top of the page, there is a template selector. The selector provides access to a few pre-configured templates based on different color schemes.

After selecting the template you require from the drop-down list, below the template selector, you will be able to preview the way your payment form will look based on this template. Simply choose the template that best suits your preference, but do not worry if the fonts or the color combination used by the template are not ideal - you will be able to tweak the template at a later time.
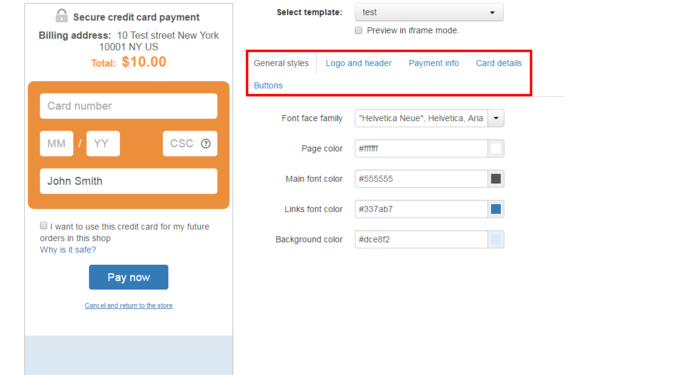
Second, you need to adjust the payment form layout settings:
- Ask for Cardholder name: This setting determines whether Cardholder name input via the payment form should be enabled. If you disable the "Ask for Cardholder name" option here, the Cardholder name will be taken from the buyer's completed billing address form.
- Display "Save card" option enabled by default: This setting affects only payment configurations that support tokenization. It determines the initial state of the check box option to save the payment card for future use with the store - as shown to the customer on the payment form. (NB: This option is titled "I want to use this credit card for my future orders in this shop"). If you enable the option 'Display "Save card" option enabled by default', the payment form will be loaded for your customers with the "Save card" option pre-enabled; your customers will be able to disable it if they wish to. If you keep this option disabled, the check box option to save the card will be first loaded as disabled; your customers will be able to enable it.
After adjusting the payment form layout settings, be sure to save your changes by clicking Save.

For the sake of example, let us create a custom template based on the template "Orange":
- In the Payment templates section of your X-Payments back end (Settings -> Templates), select the template on which you would like to base your work (in our case - "Orange"):
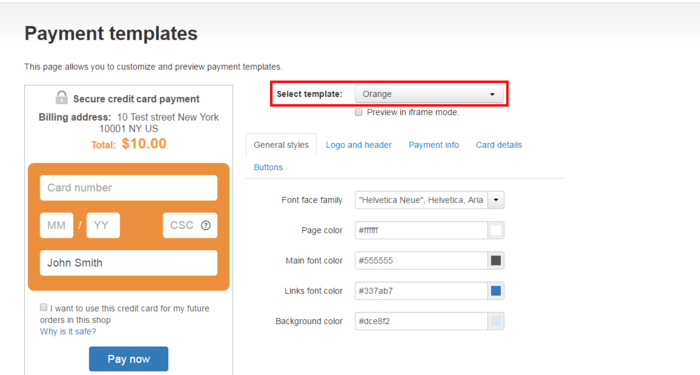
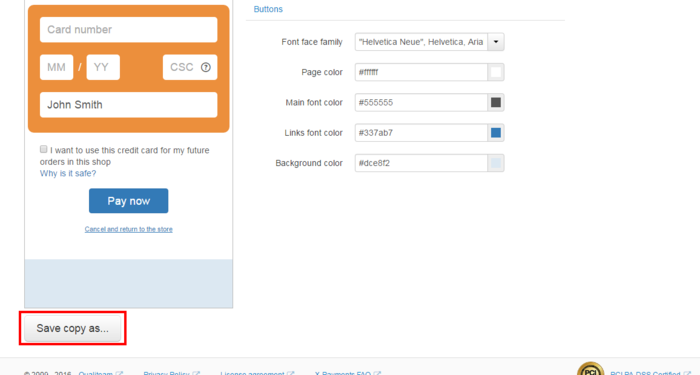
(Note how the payment form preview on the left-hand side of the page changes after a new template has been selected). - Create a copy of the template "Orange". To do so, click the button Save copy as... below the payment form preview area:
A popup form appears on the screen allowing you to enter a name for your template copy: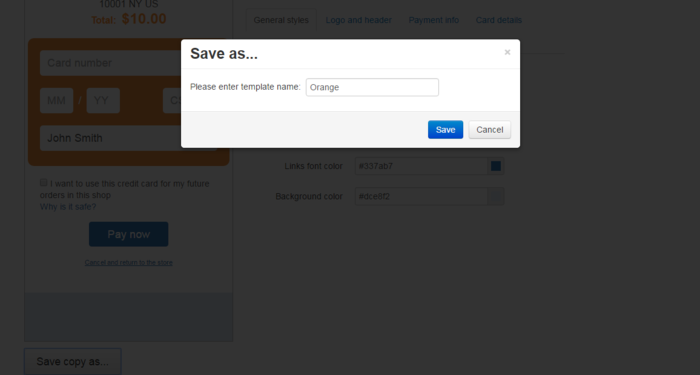
Simply replace the name of the original template with a new one (Below you can see how we changed the name "Orange" to "test") and click Save: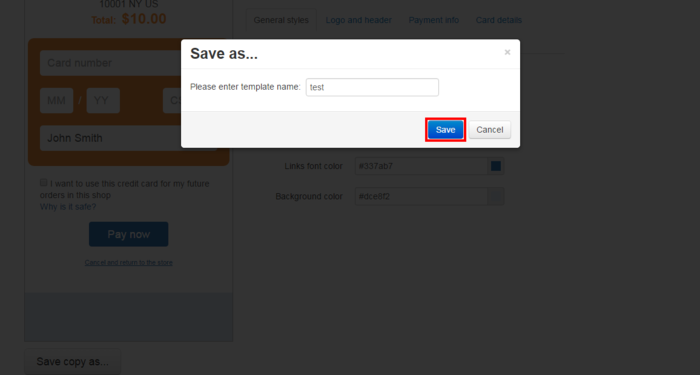
The template copy will be created: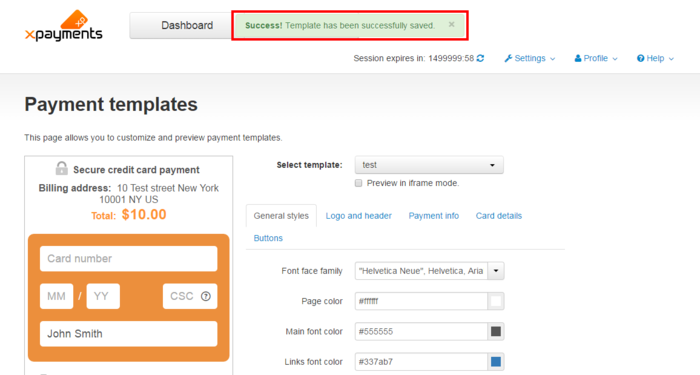
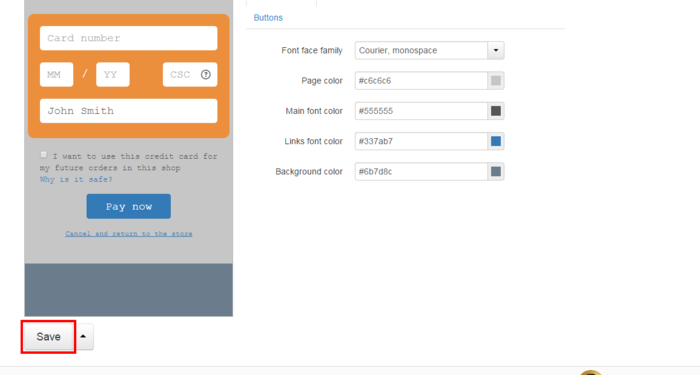
Now you can safely play with the settings on the template copy without running the risk of spoiling the original template (in our case, "Orange"). If you do not like the result, you will be able to discard the template copy and start anew at any time. - The settings below the template selector allow you to adjust the various aspects of the payment form appearance. Click the tabs (General styles, Logo and header, Payment info, Card details and Buttons) to access the settings you require.
To change the template, try changing the original styles to the ones you require. Your changes will be shown on the preview in real time:
- Click Save to save the changes:
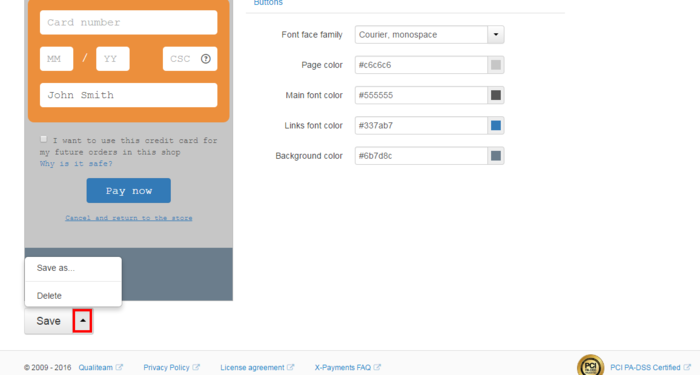
Now you have a new template which you can select when configuring your online stores. - If necessary, you can delete the template or save its copy under a new name:


See also: