XP Cloud:Payflow Pro
This article provides instructions for how to configure Payflow Pro for use with X-Payments Cloud.
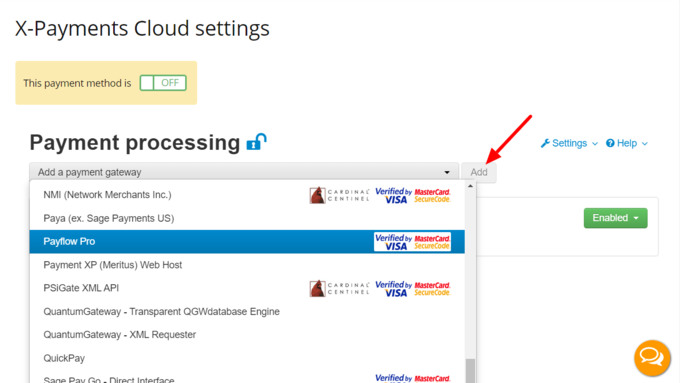
- On the X-Payments Cloud settings page, select Settings > Payment processing.
- From the 'Add a payment gateway' dropdown box, select "Payflow Pro" and click Add:
- On the page that opens, adjust the settings for your Payflow Pro payment configuration.
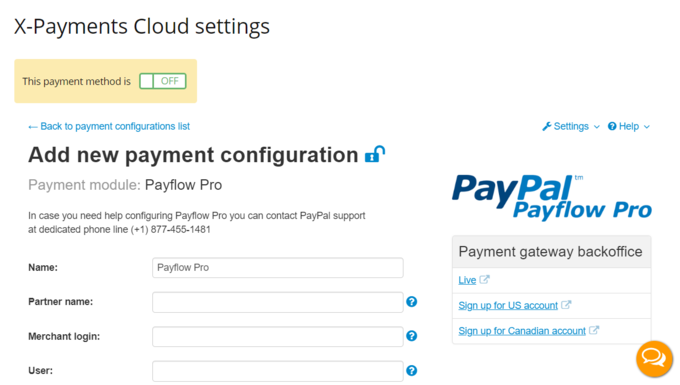
You will need to adjust the following fields:- Name: Any name that will help you to identify this payment configuration (it will be visible in the X-Payments Cloud admin panel and the admin panel of your online store; not visible to your customers); for example, Payflow Pro.
- Partner name: Partner ID of the partner that signed you up for the account. If you signed up directly through PayPal, this will be "PayPal".
- Merchant login: The merchant login name that you chose when you signed up for the service.
- User: The username that you have set up for running transactions. If you have not specifically set up a username to run transactions, then this will be the same as the "Merchant login".
- Password: The password for the user account denoted in the "User" field.Note: The values for the fields Partner name, Merchant login, User and Password are your Payflow API credentials that were set up when you created your PayPal Manager (Payflow) account. They are the same as your PayPal Manager login at https://manager.paypal.com.
- Test/Live mode: PayPal operating mode. ('Live' should be selected for live stores, 'Test' for testing.)
- Initial transaction: Choose Auth or Auth and capture.
- Order prefix: Your trading name or any other prefix that will help you to identify a payment transaction as originating from this store. The "Order prefix" field is required when using the same PayPal account for more than one online stores.
- Accept currencies: The currencies in which you will be able to accept payments via the payment method based on this payment configuration. By default, this setting is pre-set to All supported (N), which means all the currencies supported by the payment gateway - with the number N specifying the number of currencies. To limit the range of currencies that will be accepted, click on the All supported (N) button, uncheck the Select all box - this will unselect all the selected currencies - and check the boxes for the currencies that you will accept.
- Credit card types: The credit card types you are going to accept.
- Call-back IPs: Use the Add address button to specify the IP addresses from which you will receive PayPal callback requests.
- Cancel not captured Enable the checkbox option "Void not captured "auth only" payments in 30 days automatically" to ensure that the hold on the funds for which an authorization has been obtained is lifted automatically no later than 30 days after the payment if no capture of the funds has been performed.
- After adjusting the settings as required, save your changes. Make sure the payment configuration you have added is active (enabled).

