X-Payments:Configure the connection to your Zoey store in the X-Payments back end
To begin the process of connecting your X-Payments to Zoey, log in to the admin back end of your X-Payments and complete a few preliminary steps that will enable your X-Payments to connect to your Zoey store and to the payment gateway through which your customers' payments will be processed.
Complete the following steps:
- Log in to X-Payments as administrator.
- Provide your X-Payments application with data required to connect to your chosen payment gateway by creating a new payment configuration.
Note that if you are going to accept payments in more than one currencies, you will need to create a separate payment configuration for each currency that you are going to use. More information on how to configure your Zoey store to accept payments in different currencies via X-Payments can be found in the section Zoey and X-Payments: Multi-Currency Configuration.
Here's how to add a payment configuration in X-Payments:- In the X-Payments back end, go to the 'Payment Configurations' page (Settings -> Payment configurations):
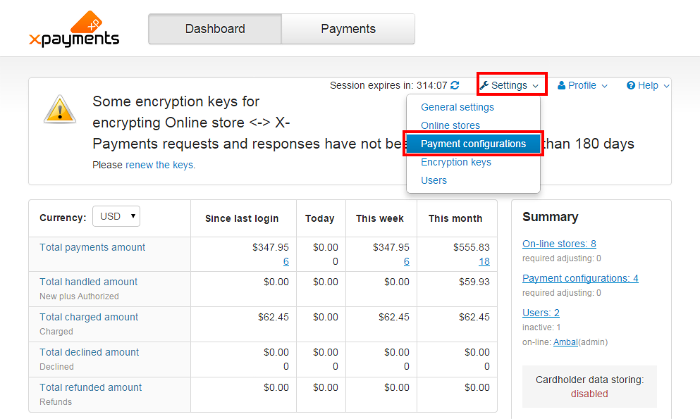
- From the New configuration drop-down box, select the payment module that X-Payments should use to connect to the payment gateway that will process your Zoey store payment transactions and click Add new.
- On the page that opens, enter all the required configuration parameters.
- Click Save to save the changes. You have created a payment configuration.
- Make sure the payment configuration you have created is enabled.
- In the X-Payments back end, go to the 'Payment Configurations' page (Settings -> Payment configurations):
- Provide your X-Payments application with data required to connect to your Zoey store:
- In the X-Payments back end, go to the 'Online Stores' page (Settings -> Online stores).
- Click Add new.
- On the page that opens, enter your Zoey store name, store title and order prefix.
- Specify the templates that you would like to use for the payment pages in your Zoey store (a template for laptop and desktop users, a template for mobile users and a template for users who have 3-D Secure protection enabled).
- Specify the payment configuration you would like to use for this store (Select the payment configuration you have configured at the previous step).
- Click Save to save the changes.
- Make sure the online store is enabled.

You have completed configuring the connection in X-Payments.
Before you proceed to configuring the connection in your Zoey Control Panel, please pay attention to the Connection section on the right-hand side of the page with the details of your Zoey store in X-Payments. Here you should be able to see the so-called configuration bundle for your Zoey store. The configuration bundle provides a quick method to deploy X-Payments connection settings in your Zoey store. You will need this bundle when you will be configuring the connection in your Zoey Control Panel. For now, simply click the Copy button to copy the bundle to clipboard so you have it at the ready when it is time to paste it on the Zoey end.
Now you can configure the connection to X-Payments in the Zoey store Control Panel.