XP Cloud:CyberSource - SOAP toolkit API
To be able to use CyberSource - SOAP toolkit API with X-Payments Cloud, complete the following steps:
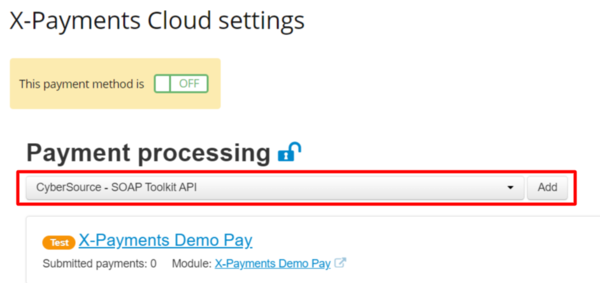
- Click Settings > Payment processing to go to the Payment processing page.
- From the 'New configuration' drop-down box, select "CyberSource - SOAP toolkit API" and click Add:
- The payment configuration page opens:

- Complete the fields on this page:
- Name: Enter the name of your CyberSource configuration.
- Merchant ID: Enter the Merchant ID you received from your CyberSource account.
- Security key: Copy and paste your security key (The key for production can be generated in the CyberSource Business Center; for testing purposes, you will need to use Test Login. Instructions for security key generation are available here: https://support.cybersource.com/s/article/How-to-Generate-a-SOAP-Toolkit-API-Security-Key. )
- Test/Live mode: Specify whether you are going to run transactions in Test or Live mode.
- Initial transaction: Choose Auth or Auth and capture.
- Payment tokenization: Specify how you want tokenization to be handled.
- Use built-in 3-D Secure: Specify whether you want to use the built-in 3-D Secure feature by CyberSource (Make sure your CyberSource account supports this feature before enabling it in X-Payments Cloud.)
- Order prefix: Your trading name or any other prefix that will help you to identify a payment transaction as originating from this store.
- Accept currencies: The currencies that you want to be used for payments via this method.
- Credit card types: Credit card types you are going to accept.
- Cancel not captured Enable the checkbox option "Void not captured "auth only" payments in 30 days automatically" to ensure that the hold on the funds for which an authorization has been obtained is lifted automatically no later than 30 days after the payment if capture of the funds has not been performed.
- Click Save.

